
Build with Cursor
Unlike Lovable, Cursor doesn't manage infrastructure for you — you run a local backend and frontend on your own machine, using one script to start everything. The whole flow is driven by a single chat command: build.
Prerequisites
- Cursor installed
- Docker (Compose v2 plugin or docker-compose) —
run.shcan install this for you if missing - Node.js 18+ — run.sh can install this for you if missing
- Your Volt sandbox or production credentials: API Key, User ID, Merchant ID
- Download the PROJECT.zip (Click Here).
Step 1 — Get the Project Files
Download PROJECT.zip and extract it. The project folder will look something like this after extracting it:
<PROJECT>/
├── .cursor/
│   └── volt-build-workflow.mdc
├── README.md
├── SETUP_GUARD.md
├── backend_prompt.md
├── frontend_prompt.md
└── run.sh
Open the extracted folder in Cursor.
Step 2 — Type build
buildIn the Cursor chat, type:
buildStep 3 — Confirm Plan Mode
Cursor will ask you to switch to Plan mode first — prompt files can't switch modes automatically, so you'll need to click manually or If you're already in Plan mode, select "I'm in Plan mode - continue"
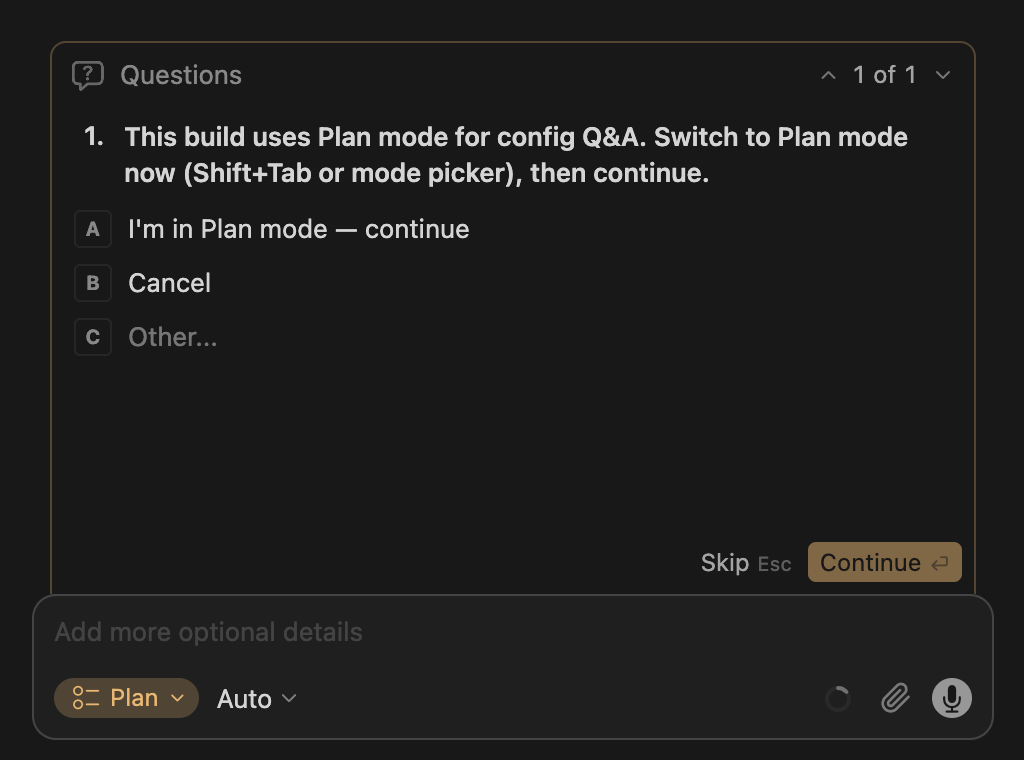
Step 4 — Answer the Setup Wizard
Cursor will ask a series of questions in order, one at a time:
| Question | What it's for |
|---|---|
| Provide Volt API credentials now, or skip? | If yes, paste API Key, User ID, Merchant ID in chat when asked |
| Enable file logging? | Optional — defaults to off |
| Ship logs to Elasticsearch? | Only asked if logging is on; local Docker, remote, or skip |
| Save booking data in MongoDB? | Optional — if yes, you'll also give a Mongo URI and DB name |
| Backend and frontend, or backend only? | Choose Backend and frontend for the full app |
If you skip the credentials step, hotel search and booking won't work until you run configure env later to add them.
Step 5 — Click Build
Once the Cursor AI finishes, it shows a plan summarizing your answers. Click Build, and it scaffolds the backend and frontend, end to end without asking for approval on every step.
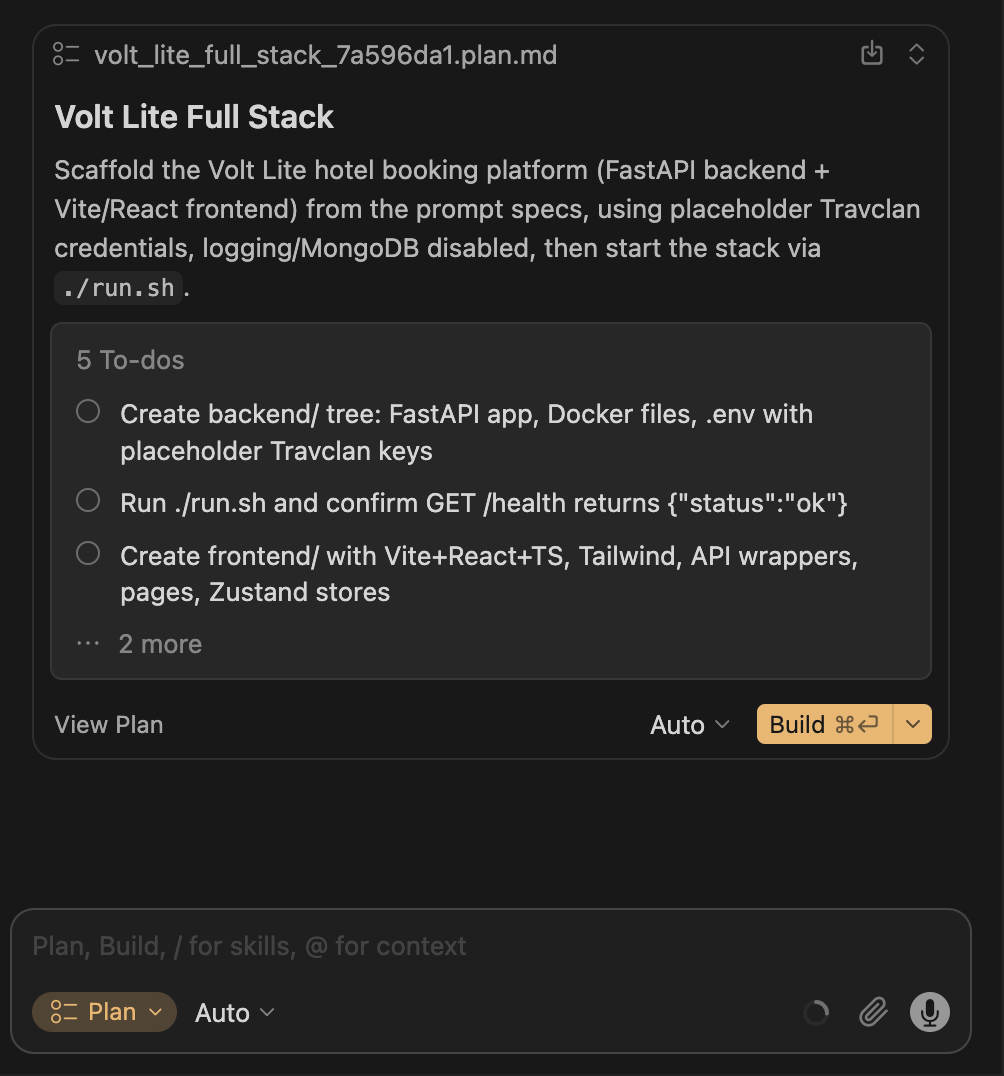
Step 6 — Run It
From the repo root, in your terminal:
./run.shThis starts the backend and frontend together (backend only if you chose backend-only in Step 4), and streams logs in the same terminal.
| Service | URL |
|---|---|
| App | http://localhost:5173 |
| API docs | http://localhost:8000/docs |
| Health check | http://localhost:8000/health |
Everyday Use
Once it's built, you don't repeat the wizard — just use the script:
./run.sh          # start backend + frontend
./run.sh stop     # stop everything
./run.sh health   # quick API check
./run.sh logs     # tail backend logs (second terminal)
./run.sh status   # ports + containers + Node version
Troubleshooting
Refer to the troubleshooting page if you encounter any issues after building your application with Cursor.
Updated 3 months ago